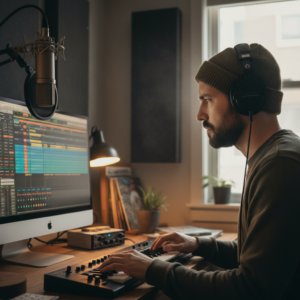
For many aspiring artists and producers, the dream of a professional studio setup often clashes with the reality of a spare bedroom or a cluttered living space. There’s a pervasive myth that whispers:
📹 Watch the video above to learn more!
“You can’t get good vocals without a perfectly isolated, acoustically treated recording booth.”
This idea can be paralyzing, leading to delayed projects, frustration, and a belief that quality sound is only accessible to those with deep pockets. At Musiketo, we believe every independent creator deserves to make their best work, regardless of their budget or dedicated studio space. The truth is, you absolutely *can* capture professional-sounding vocals in an ordinary room. It’s not about expensive gear or elaborate construction; it’s about understanding sound, making smart choices, and using your environment creatively.
Beyond the Booth: Dispelling the Home Studio Myth
The image of a soundproof, padded vocal booth is iconic, but it’s also intimidating. While professional studios use such spaces for ultimate control, they aren’t the only path to great sound. Many of your favorite independent artists and even mainstream hits have started in far humbler surroundings. The core issue isn’t eliminating *all* sound from your room; it’s about controlling undesirable reflections and external noise.
The Myth of the Anechoic Chamber
An anechoic chamber is a room designed to absorb all sound reflections, creating an eerily quiet environment. While fascinating, it’s not ideal for recording. A completely dead room can sound unnatural and flat, lacking the subtle character that gives recordings life. What we’re aiming for in a home setup is to minimize harsh echoes, reverb, and external distractions, allowing your vocal performance to shine through with clarity and presence.
Understanding Your Recording Space: It’s About Control, Not Perfection
Before you even think about microphones or software, become a detective of your own space. Every room has acoustic properties that affect sound. Hard, parallel surfaces like bare walls, windows, and hardwood floors will bounce sound waves around, creating echoes and flutter echo, which can muddy your recordings. Soft, irregular surfaces like curtains, carpets, and bookshelves will absorb or diffuse sound.
Listen First: Diagnosing Your Room’s Acoustics
Spend some time simply listening in your potential recording space. Clap your hands, speak loudly, or sing a sustained note. Listen for:
- Reverb: How long does the sound linger? A long decay means a ‘lively’ room.
- Flutter Echo: A rapid, repeating echo often heard between parallel hard surfaces.
- External Noise: Traffic, refrigerators, humming computers, noisy neighbors.
Identifying these issues is the first step toward addressing them.
Practical Steps to Tame Your Room and Elevate Your Vocals
Once you know your room’s quirks, you can start implementing practical, often free or low-cost solutions.
Strategic Placement: The Cheapest Acoustic Treatment
Your microphone’s position relative to your walls makes a huge difference. Avoid recording directly in the center of a room or facing a bare wall, as these amplify reflections. Instead:
- Corners are your friends: Recording into a corner (with some absorption behind you) can often help.
- Face soft surfaces: Position yourself so that the primary sound reflection points (where your voice hits a wall and bounces back to the mic) are soft, like a heavily curtained window or a bookshelf full of books.
- Get closer to the microphone: The closer you are to the mic, the louder your voice will be relative to the room’s ambience, minimizing the room’s impact. Just be mindful of the proximity effect with directional microphones, which can boost bass frequencies.
DIY Absorption: Blankets, Comforters, and Beyond
This is where creativity meets effectiveness. You don’t need expensive acoustic foam. Think soft, heavy, and porous:
- Duvets and comforters: Drape heavy blankets or duvets over microphone stands, behind your vocal position, or even hang them from temporary hooks or clotheslines to create a makeshift ‘vocal fort’ or ‘gobo’ (go-between).
- Closets: A walk-in closet full of clothes is naturally well-dampened. It can be an excellent, ready-made vocal booth.
- Furniture: Position yourself near a large, upholstered couch, a bed, or even a messy bookshelf. These items break up sound waves.
- Rugs and carpets: If you have hard floors, a thick rug will make a significant difference.
Microphone Matters: Patterns, Proximity, and Placement
While any microphone can capture a vocal, understanding its properties helps:
- Polar Patterns: A cardioid microphone (most common) picks up sound primarily from the front, rejecting more from the sides and rear. This helps minimize room sound if pointed correctly.
- Dynamic vs. Condenser: Dynamic mics (like an SM58) are generally less sensitive and pick up less room noise than condenser mics, making them great for untreated spaces. Condensers offer more detail but demand a quieter environment.
- Microphone Shield/Reflection Filter: These devices wrap around the back and sides of your mic, absorbing reflections that would otherwise bounce into the microphone. They are a worthwhile investment for home recording.
From Raw Track to Polished Sound: Post-Production Essentials
Even with careful recording, some room character might remain. This is where your Digital Audio Workstation (DAW) comes in.
Targeted EQ and Dynamic Processing
- Subtractive EQ: Listen for muddy low-mid frequencies (around 200-500 Hz) that often build up from room resonance. Use an EQ to gently cut these. You might also find a slight boost in the upper mids (2-5 kHz) can help vocals cut through, but be careful not to make them harsh.
- Gating/Expansion: A gate can help silence unwanted noise during pauses in the vocal, but be gentle. An expander offers a more subtle way to reduce quiet room noise without chopping off vocal tails.
The Power of De-reverb and Noise Reduction
Many DAWs and third-party plugins offer tools specifically designed to clean up recordings:
- De-reverb Plugins: These intelligent tools can analyze your recording and reduce the amount of inherent room reverb without making the vocal sound unnatural. Use them subtly.
- Noise Reduction Software: Tools like iZotope RX or even simpler built-in noise reduction in your DAW can effectively remove constant hums (from computers, refrigerators) or hiss, but be careful not to over-process, as it can introduce artifacts.
Your Unique Sound: Embracing Limitations and Creative Solutions
Ultimately, a ‘perfect’ vocal sound is subjective. Some of the most beloved recordings have embraced the character of their recording environment. Don’t let the pursuit of an impossible ideal stop you from creating. View your home setup not as a limitation, but as a unique canvas. Experiment, listen critically, and find what works for your voice and your style.
The goal isn’t to perfectly replicate a million-dollar studio; it’s to capture your best performance with as much clarity and intention as possible. With a little knowledge and creativity, your spare room can become a powerful launchpad for your musical vision.
Your Next Step: Find the quietest corner or closet in your home, grab your microphone, and experiment with hanging a thick blanket behind you. Record a short vocal passage, then listen back critically, paying attention to how these simple changes affect your sound.